|
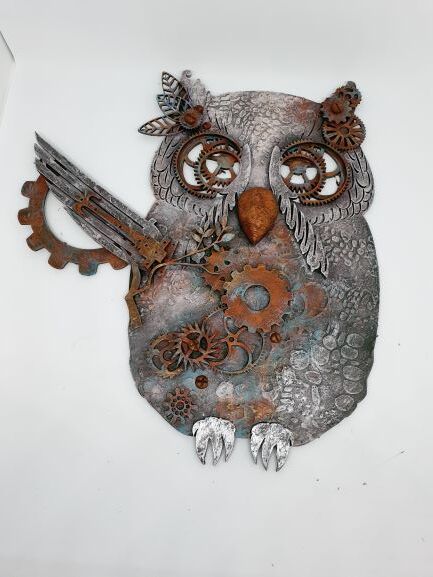
Hi to all our Powertex Addicts, the July Inspirational Theme was Rusty Wisdom!!! When I opened my Designer Kit my heart skipped a beat… there were 2 big eyes staring up at me… Well hello there little one… Right away he had personality and I needed to bring him to life…. Here’s my Journey with Dabby the Dabbing Owl…!!! Materials used:
Tools required
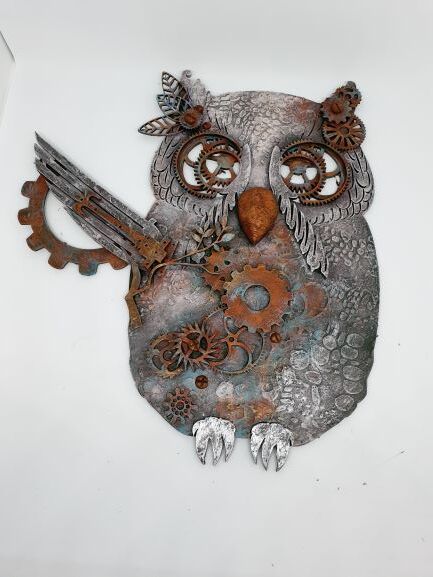
Let the Fun Begin WOW… What fun I had in creating Dabby!!!!My grandson’s Jake & Ashley were my inspiration behind his name and quirky nature… The boys loved the owl kit and were super excited hoping that this might be an activity they will do over the upcoming school holidays… Looks like Funky Nanna is going to have some fun with her boys! So, when I had my kit out with all the bits to design my owl one of the things that I had a bit of fun with were his wings… I love quirky… so of course his wings were going to be doing something quite different! Firstly, I had him playing hide and seek with us all… then I did it!!! The house erupted with noises of Yes Nanny that’s it leave him like that … So I knew I had a hit… Yes a winner for sure!!! Who knew my Owl was Dabbing and so were the boys by this time all over the house… That set the mood for the remainder of the arvo, the boys picked the tunes so that Dabby the Dabbing Owl could come to life… So let’s get you all started… Prep your work area by covering your surface and any work mats with plastic. Get all your bits and bobs needed out and lastly don’t forget your warm soapy water and a jar or something with water to rinse your paintbrushes into, unless of course you would like to add these to your art work (remember Powertex will harden anything when dried including your brushes).… Could be pretty cool!
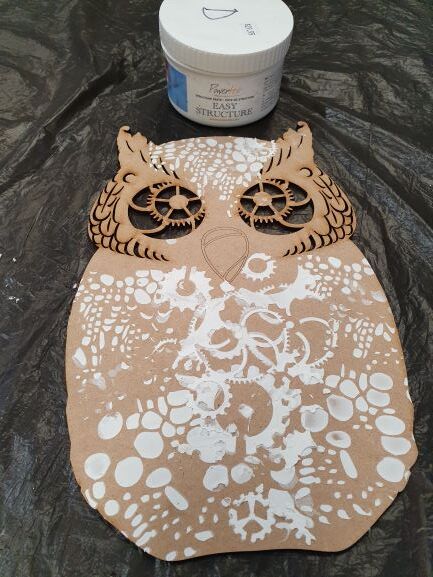
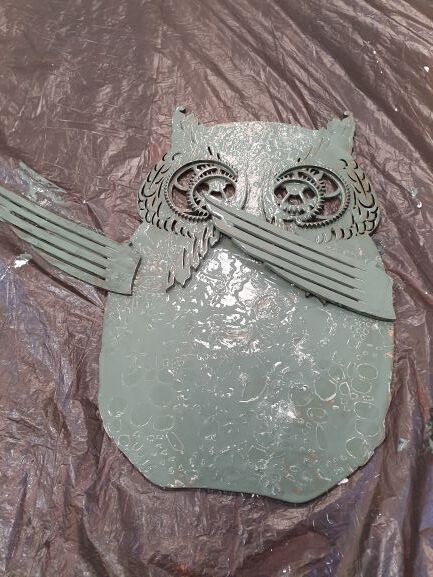
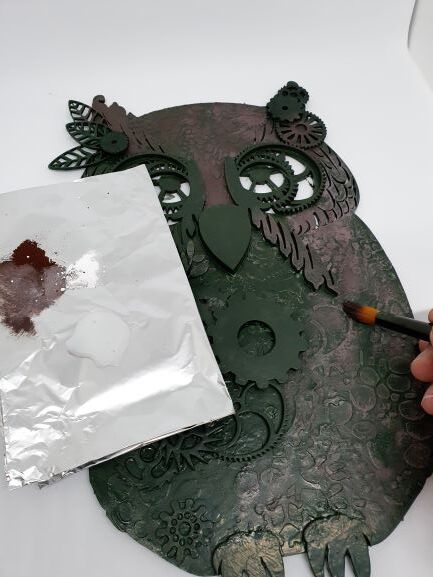
3. Prep your MDF pieces first by gently sanding both the top and back of all your mdf pieces, then wipe all the dust off. Using your DA Riverstone stencil and easy structure and your shopping card wipe some texture paste over the stencil to the body of your owl. Take care when lifting your stencil that you do not smudge your structure paste… Dry this using a hair dryer then use your cog stencil around in area of his belly. Again dry this layer with a hair dryer. Ensure that you wash both your stencils and shopping card. Put his body to one side & coat all your other mdf pieces and chippies with a layer of Powertex taking care to get into all the cracks and crevices. Paint Powertex onto the top of the owl’s body when the easy structure paste is dried 4. Now before we turn him over, we’ll attach his MDF beak pieces to his face… Using Powertex paint the back of the 2 beak pieces and place them one on top of the other where the marking is for them to go on the main body piece of MDF 5. Once this layer of Powertex has dried, if it’s looking a little translucent, it may need a second coat if not turn all your pieces over onto a clean piece of glad wrap and paint all the backs with Powertex. 6. Now we are going to prep our area to colour our pieces up, so do a quick tidy up around you and let’s get our colours out… 7. The owl’s body I dried brush with Powercolours of Dark Brown and Titanium White… So, using the tip of a clean pallet knife get a small amount of your dark brown and place onto your piece of folded alfoil then do the same with the titanium white placing it onto the pallet but not on top of the brown… You’ll now put a small drop of easycoat glossy onto this pallet but away from the pigments… 8. Using the tip of your brush pick up a little Easycoat Glossy then pick up a little dark brown rub this on the pallet on a clean area to make a dryish paste (not too wet or dry) then pick up a little titanium white and mix this into the brown paste. Now you’re ready to dry brush this over his body, wings and feet… Keep repeating this step until you get the desired look… If you want to get lighter areas add more white to your mix and more brown if you want an area darker… Put a little brown onto your birds and the branches too… 9. Now let’s get down and dirty with our ‘Faux Rust Technique…’ So, on your palette if you still have some easycoat glossy left great if not add a little more… Now add a little of the following Powercolours to your pallet – red ochre, titanium white, either mars orange if you have it or mocha and omg my all-time favourite turquoise (don’t forget the turquoise)… YAY … are you ready??? Yes, well let’s get rusting our pieces up… 10. Starting with a mix of red ochre and Easycoat Glossy into a paste we will use the above dry brush technique. Dry brush this all over the fronts of your cogs, barbed wire, hinges, your branches, leaves and the area on his belly that you used the cog stencil on… mmmmm nice huh… Ok now we will dry brush our mars orange around on all these pieces that we put the red ochre (at this stage we are not colouring the whole area with this colour just little here and there). Ooooohhhhh Yeah are you getting excited… Lastly clean and dry your brush really well (it should not be moist from water)… Now we are going to pick up some easycoat glossy with the tip of our brush, then pick up a little of the turquoise, mix this into a paste on the pallet then add a little titanium white with the tip of your brush and mix into the turquoise… The first layer with this colour you doesn’t want too light … Now dry brush this sparingly over all your cogs, hinges, leaves and the leaves on the branches and a little on the belly of your birds and truly this is just a hint on the cogs, but on the leaves, you can go a little heavier if you like… Now to add some ‘Metallic Colourtrix Magic’ 11. We’re using Rich Gold and White silver with easycoat glossy… as with your above colours put a little bit of each of these colourtrix colours out onto you piece of alfoil and a tiny bit of easycoat glossy… I dried brushed white silver using the above technique on the owl’s head, on the stone stencilled part of his body, the edges of his wings, feet and the birds’ breast where the turquoise was brushed… The rich gold I dried brushed onto the cogs, a little on the hinges & barbed wire. I only put a very small amount around, this is a highlight only… 12. Now for the Assemblage… (Clean your area & clean your brushes well with warm soapy water. Hope that you’re having fun and not feeling like Sadie the Cleaning Lady). You will need your Powertex, brush, water, readymade stoneart clay for the next steps so get them ready… 13. Now go back to your phone and look at the picture that you took of your layout and where you wanted all your yummy pieces to go. Lay these over your owl’s body… Happy? You will also notice his beak on my pic has been 3D’d I did this by using a piece of stone art clay that I shaped into a teardrop put some green Powertex onto his beak then pushed this piece of clay onto it and gently shaping it around his beak. Then I dry brushed some rich gold onto this. 14. Now start attaching your pieces by using the green Powertex as a glue for all your pieces… Any that you would like raised or need a little more stick that is where you will use a little stone art clay under your pieces before sticking down… Remember to paint a little green Powertex on the base of your chippy then put the clay on top of that then paint a little more Powertex on the clay surface then gently push into place… Voila!!! 15. Remember you will have time to amend and move pieces as the Powertex is a slow drying adhesive but be careful as we are using green and we have pre coloured our pieces so having a damp cloth to wipe any excess Powertex that be visible on your embellished surface due to you relocating a piece. If you are lucky enough to have transparent Powertex in your collection then I advise to use this to alleviate this problem. 16. Wings Assemblage – the 2 large halves of the cogs I stuck to the underneath of my wings. How I did this was by painting a little green Powertex onto the ends of the cogs placed a little stone art clay applied a little more Powertex onto the top of this clay then pushed my wings into position on top of these exposing the bottom of the cogs (please refer to pic). Stick your hinges into place. Then stick your wings into position. Depending on how you are positioning the wings you may need a little stone art clay to assist with this process… 17. Barbed wire assemblage – you guessed it again this is where stone art clay is a much needed to hold your 2 pieces together, that is if you want it how I have placed them together… Review all your pieces and where you have put them if any of these don’t have much surface area of Powertex being used as your glue then gently lift and add stoneart. o what have you called your Owl? Did he or she talk to you along the way??? Remember all the products & pieces I have used are available now at Powertex Australia. I thank you for taking the time to read my blog for the Australian Powertex Design Team I look forward to sharing more hints and tips with you all next month.
Cheers to you all Your Friendly Neighbourhood Powertex Fanatic RenWA ( Reneé Warwick)
0 Comments
Your comment will be posted after it is approved.
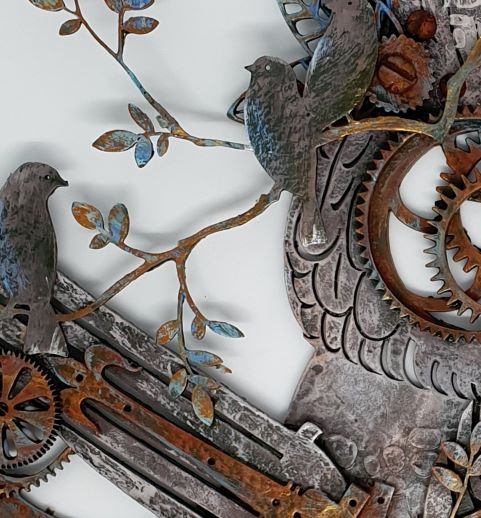
Leave a Reply. |
AuthorNatalie Parish creates eclectic pieces of art. She is the Distributor and Design Team Trainer for Powertex in QLD Australia and enjoys sharing her passion for the product Archives
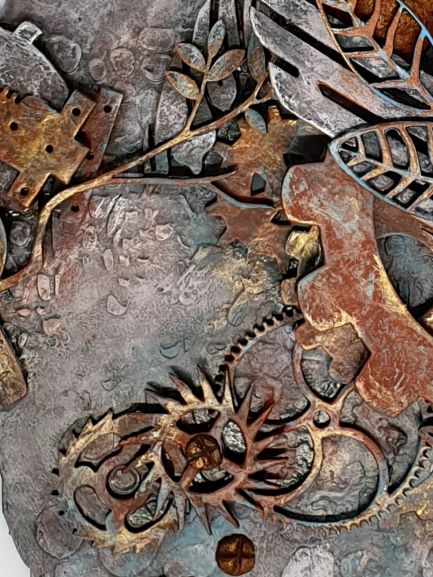
September 2021
Categories
|
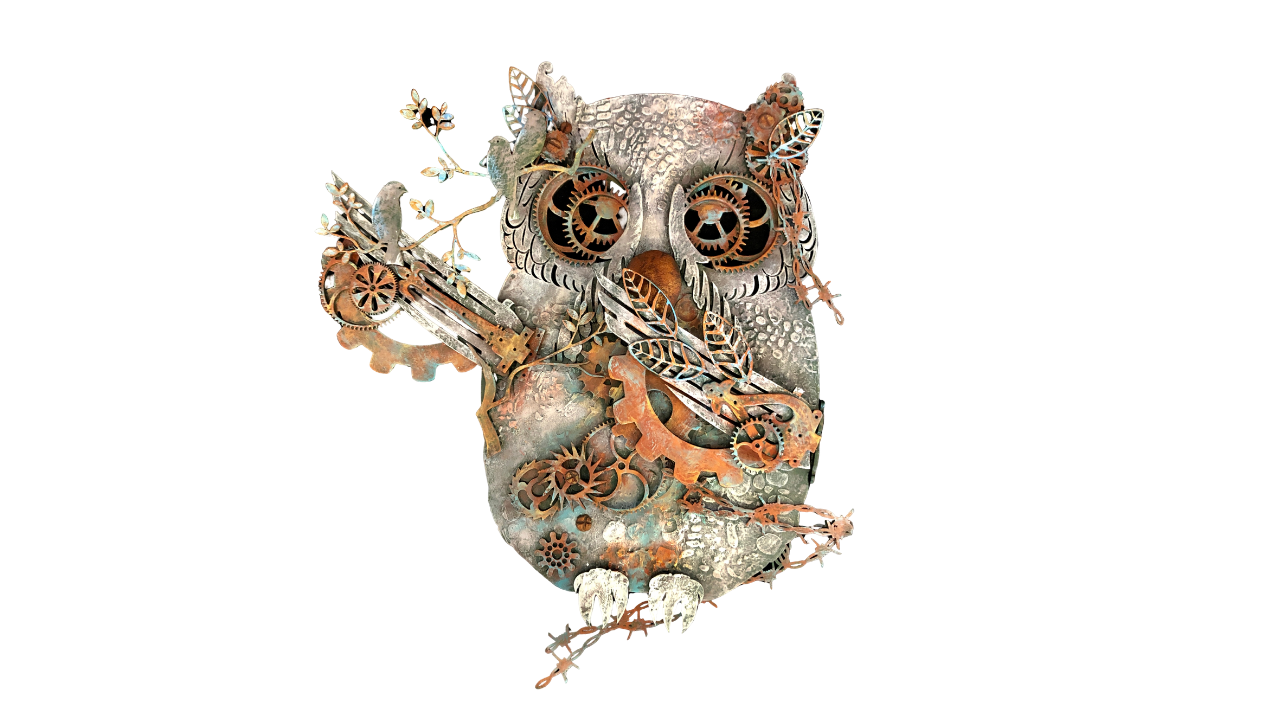
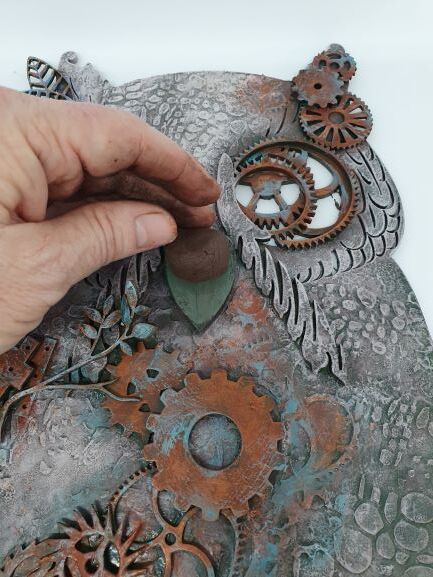
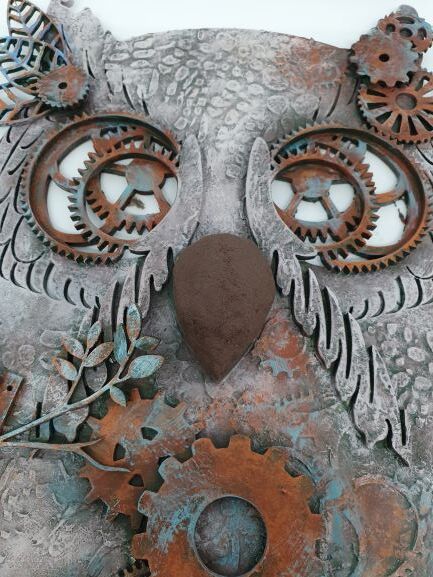
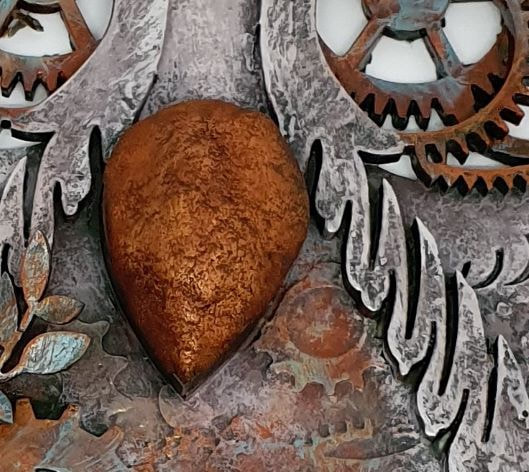
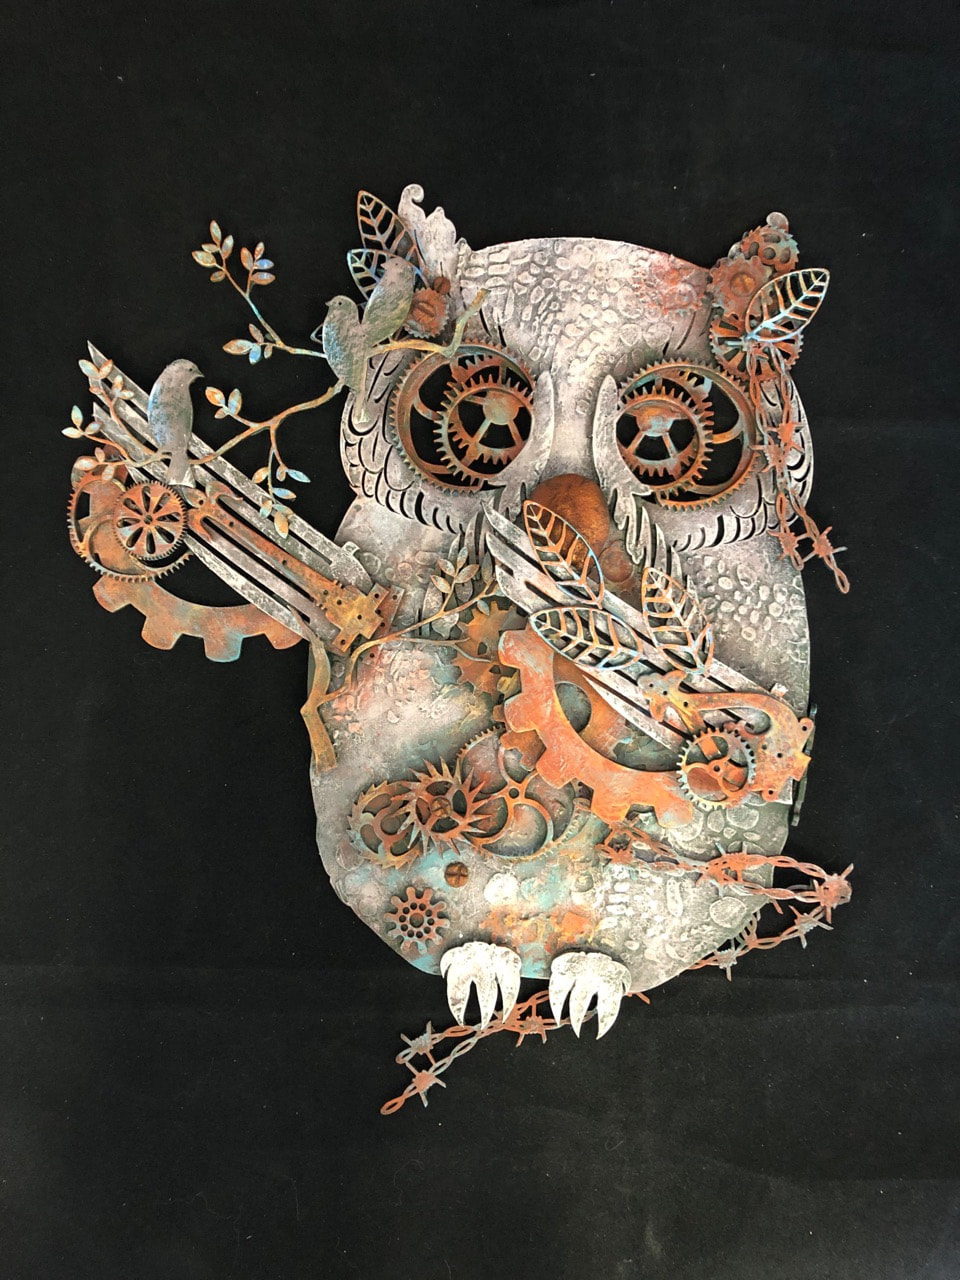
 RSS Feed